Sunday, November 23, 2008

Setup Pentaho 1.7 GA

Pentaho BI 1.7 GA is the open-source Business Intelligence suite that allows you to report, analyse and manage data through E.T.L process. You can download the full BI suite installer for Linux at this link.

1- Setup MySQL database server and client
Pentaho 1.7GA installer comes with MySQL with the databases used for repository, so you don't normally need to setup the database server. But I found it necessary though, as I could not access the database server content with MySQL client if the database server is setup with BI server.

2- Make the Installer file executable
To setup the BIN installation file, open a terminal window and go to the folder you place in your BIN file.
Make sure first your BIN file is executable with the following command:
chmod +x pentaho-1.7GA-linux-opensource-installer.bin

3- Setup the BI suite
Then from the terminal window, type:
./pentaho-1.7GA-linux-opensource-installer.bin
The installation wizard launch in a new window.


Click Forward. Accept the Agreement and click Forward.
Select the component you would like to be installed.


Click Forward. Then select the Easy installation option.


This Easy installation set up MySQL as the default database repository and JBoss as the application server. Click Forward.


Click Forward. The next window allows you to choose for your MySQL database installation option.


Choose the 2nd option to use the database server already setup in your system and let the Installer create the repository.


You can change the MySQL Binary Directory to /usr/bin which is the default location of the database server executive file for Ubuntu, Debian and Fedora distributions.
The next window asks you to setup your MySQL root user information.


Click Forward. The next window asks you to provide a name for your Solution Repository. The default name provided is "hibernate".


The next window asks you to provide a name for your Quartz Repository.
After clicking Next, you are asked to provide a name for your SampleData Repository. Then, the next window asks for a username and password to access your repository databases.

You can click Forward to have the Summary for your installation. Click Forward again to confirm your choices. The setup process will start.


To run the BI server, from a command prompt, you go the path where your application is installed and then type the following command:

./start-pentaho.sh

You can access your BI dashboard from your browser at the following address:

http://localhost:8080/pentaho


Saturday, November 8, 2008

Virtual Networking with xVM 2.0.4

With Virtual Box 2.1.4 and later version, the process has been simplified.

Even though Sun's documentation provided with the software is full of useful detailed information, it might take some time to read and understand everything if you want to quick setup a virtual networking. Once you have first setup a xVM guest, a default network adapter is automatically created with the Network Translation Address mode and will allow you to use the Internet and other network connections of your host. This mode does not require configuration and the xVM will act like a router between your host and your guest; your guest will receive an IP address. But this IP address will be on a completely different network than your host, and like any host in a private network, the (xVM) guest will be invisible from the outside network. (Unless you use the Port Forwarding functionality, which requires some command-line configuration and also still have limitations.) If you need to setup a (Web/Application) server on your guest, you can choose the Host Interface Networking mode. This mode will create a brand new Networking Interface (for your guest) in your host computer.

Warning: Setting up this mode will cause your host to lose its network connection temporarily. Because of that, do not do this on a production server unless you are aware of what you are doing on remote access or on remote access as you will lose your connection.

Network bridging is the most simple method for Host Interface Networking mode. Bridging allows you to connect several network devices together (in software), so that data sent to one of the device will be sent to all of them. Sun's documention mentions that network bridging only works for wired connection, but you will need additional settings to make it works with a wireless network adapter.
How to Configure a Host Interface Network with Vista (host) and Linux Ubuntu (guest)

1- Setup the Network Interface
From the xVM window click Settings and click Networking in the left list.Select the Interface 1 tab, check Activate Networking Interface. Select PCnet-FASTIII as the Interface Type. Sun's documentation explains the differences between those different interface types.
In the Host Network Interface, click the "Add a new interface" button in the right.

2- Create the Bridge from Windows Vista as a the host side.

From Windows Vista, go to Control Panel > Network and Sharing Center > Manage Network Connection.You can see in the list the Network Interface you have configured earlier. Control select the Virtual Box Interface and your Network Connection. Right-click and choose Bridge Connection.

You will have a new icon called Network Bridge in your Network Connections window.

Right-click the Network Bridge and go to Properties.


Click OK to apply your new change.

You now have your virtual network setup between your host and your guest.

Friday, November 7, 2008

Create a shared folder between a Windows Vista host and Ubuntu guest with Virtual Box 2.0.4

It can be useful to share some part of your host file system with your guest and Sun Virtual Box allows you to do that through Shared Folders. The documentation provided in the pdf is a good one but lack a step that can make you lose some of your precious time. So, I decided to blog the steps I used to create a shared folder between a Windows Vista host and a Ubuntu Hardy Heron guest.

1- If your guest is running, you can go to the Settings menu and choose Shared Folders. Otherwise, you click the Settings button in the xVM window. The following window appears:

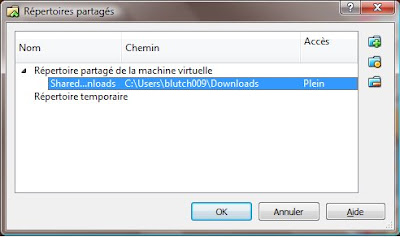
2- Click the Add a New Shared Folder button in the top right corner of the window.


From the first field, you can add the path to the folder you want to share from your host system. Then, you have to specify a name for this sharing. This name will be recognized by Linux as a device name that you will have to mount.

3- In Linux, open a Terminal and create a new directory where you would like to put your shared folder content. It's important to create a specific folder for your shared folder.

4- Then type in the following command:

mount -t vboxsf devicename mountpoint

devicename is the name you specified earlier.

mountpoint is the path to the folder you have just created.

mount is a root command. As Unix system only have one root file system, this command allows you to attach the file system found in a device to the root file system.

My mistake was to put as the mountpoint an existing folder. The consequence was that Linux will attach the new file system to that mountpoint and hide all the other elements that already existed in that mountpoint.To cancel mount command, you can use:

sudo umount devicename

Now you should be good to go.