Saturday, December 20, 2008

Setup Pentaho Design Studio for Linux and Test your installation

1- Setup Design Studio as an Eclipse plugin
At this time, there is no complete Design Studio available for Linux and Mac users. Once you have installed your Java environment, your environment variables, and the BI server, you can now install the Eclipse IDE and the plugin for Pentaho Design Studio. You can find the last version of Eclipse IDE with your Synaptic Package Manager, but the Pentaho Design Studio Release for Community can be downloaded from the Pentaho website or directly from sourceforge.net.
In the zip file, go to the plugins folder and extract the following files:
  • org.pentaho.designstudio.editors.actionsequence_2.0.0.974
  • org.pentaho.designstudio.editors.core_2.0.0.616

  • org.pentaho.designstudio.editors.reportwizard_2.0.0.1037
Move these folders to usr/lib/eclipse/plugins folder so that the plugins will be found by Eclipse. But you need first get the permission to write in the plugins folder. You can do it by giving yourself the ownership of this folder which I found is the easiest way or by changing permissions settings. The following command gives yourself the ownership of the plugins folder in Eclipse:

From usr/lib/eclipse directory, type in:

sudo chown plugins

username represent your current username. Copy the 3 previous files in your Eclipse plugin folder.

2- Create a Solution Project

Start Eclipse. Got to File > New > Project. (My Eclipse version is the 3.2.2). Expand General and select Project, click Next. Type Pentaho Solutions as the project name.

Uncheck the Use the Default Location, and Browse to your BI server installation folder > pentaho-solution. In the Package explorer, you will be able to see the content of your project.

3- Test an Hello World Action Sequence

In the left-hand tree, expand bi-developers > getting-started. Double-click HelloWorld.xaction.

In the Pentaho Server URL text box, type your BI server address which normally is: localhost:8080/pentaho. Click the Test Server button and the server login page should appear in the built-in web browser.

Log in as the Joe(admin), the password field is filled automatically. You will be redirected to the Pentaho admin page.

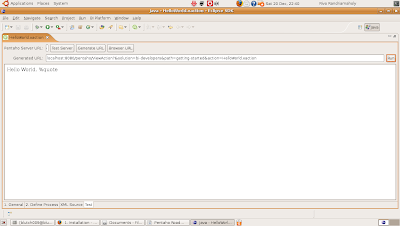
Click the Generate URL button and then click Run to open the HelloWorld.xaction page. You should have the following result.
4- Change the HelloWorld Action Sequence

Click the Define Process tab and select Hello World. In the message drop-down list box, change the "%quote" to "-I did it". As your BI server uses the DB-base solution repository, action sequences are run from the database repository. You need to tell the server to refresh the database. Go back to the test tab; you will be prompted to save your changes to your Action Sequence. Click Yes.
Go back to the admin page at localhost:8080/pentaho.
Click Tool > Refresh > Repository Cache.
A message box information will tell you that the refreshing has been successful.

Click the Generate URL button and then the Run button to display the result of the action sequence. The new page will display: Hello World - I did it.

Setup the new BI server 2.0 in Linux-Ubuntu

1- Setup the Java environment
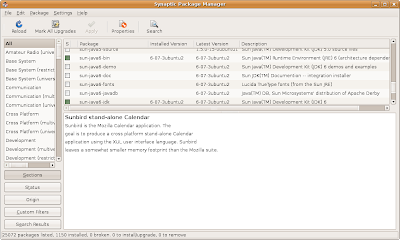
This new BI server version 2 installation and using is really more straightforward. You first need to install the last version of the Java Development Kit or Java Runtime Environment from the Synaptic Package Manager. To do this, go to System > Administration > Synaptic Package Manager. You will be prompted for your administrator password before the package manager window open.
Look for the sun-java6-jdk. Right-click and select Mark for Installation. Then click the Apply button in the toolbar. The Synaptic Package Manager will download all the necessary files and take care of the installation process automatically.

2- Setup the environment variables
You only need to setup to environment variable JAVA_HOME and JRE_HOME and make them persistent.
In you .profile file in your folder (this file is normally hidden), add the 2 following lines:
  • export JAVA_HOME=/usr/lib/jvm/java6_xxx
  • export JRE_HOME=/usr/lib/jvm/java6_xxx/jre
Then from your terminal, go to your BI server folder that you have downloaded (I dowloaded this file version for the matter of this tutorial: biserver-ce-2.0.0-RC1.tar.gz) and unzipped in your user folder. Then from the terminal window, go to your new installation folder and from there, you can start your BI server with the following command:
./start-pentaho.sh
To stop it, type in:
./stop-pentaho.sh
As you will see, this Community Release of the BI 2.0 server is embedded with hsqldb as the database server with some sample data and Apache Tomcat as the application server.

Friday, December 12, 2008

How To Make your Pentaho BI Server Accessible from your LAN

Pentaho 1.7 GA comes with JBoss as the Application Server by default. To make your server accessible from your LAN, you will need to modify your server.xml and your starting and stopping script.

1- Modify your server.xml file

In your JBoss folder, go to server > default > deploy >jboss-web.deployer >server.xml.

Change the address attribute of your connector tag to your server IP address:


2- Modify your scripts
In your start-pentaho script, add the following parameter in the line that starts the JBoss server:
-b 192.168.1.108 (The IP address should be your server IP address).
at this line /home/blutch009/pentaho/bi-server/jboss/run.sh -b 192.168.1.108
This line starts your JBoss AS and binds it to your server IP address so that it can be accessible from within your LAN at the port specified in your server.xml file (8080 by default).
In your stop-pentaho script, add your server IP address at this line after -S:
pentaho/bi-server/jboss/bin/shutdown.sh -S 192.168.1.108

Sunday, December 7, 2008

Setup a Host Interface Adapter with a Wireless internet connection in Virtual Box

In one of my previous post, I showed how to create a virtual network using the Host Interface Adapter mode with Virtual Box. This mode (compared to the Network Adapter Translation mode) allows your host and your guest having two different IP address but in the same network, so you can ping one to the other. Nevertheless, Host Interface Adapter mode does not support wireless internet connection.
To get internet access from your wireless connection in your box:

1- You need to setup manually your guest IP address
But make sure to make it different from your host. If your guest is running Linux Ubuntu, go to System > Administration > Network.
Click the Unlock button then you are prompted to add your administration password.
In the Connections tab, select your wired connection and click Properties.


Uncheck the Enable Roaming Mode checkbox. In the Configuration drop-down list, select Static IP address. Define the other parameters according to your Local Area Network configuration.
You will also need to update your DNS information which is going to be your default gateway. Go to System > Administration > Network.
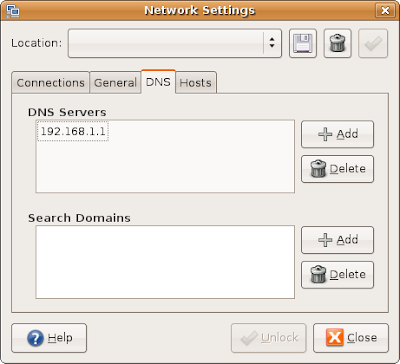
Click the Unlock button and type in your root password. Go to the DNS tab and click Add in the DNS Servers list.
Add your default gateway IP address and delete your former DNS server. Click Close.
2- Enable Network Layer 3 Compatibility
Use the netsh command from the windows terminal to force your bridge components network layer 3 compatibility, that is allow your bridge adapters be configured in promiscuous mode.
Promiscuous mode means that the network adapter passes all the packets it received to the Central Unit Process rather than filtering only the packets addressed to its MAC (Media Access Control) address. This can become an threat for your network security.
For the Host Interface Adapter mode, it allows wireless connection in a bridge receive and process packets from outside network as well as any other network adapters in the bridge. First, use the following command to retrieve the adapter ID of your bridge members:
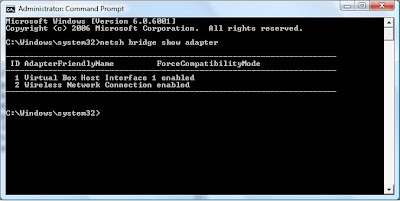
netsh bridge show adapter
You need to launch your terminal window as an administrator (right-click and Run as an administrator) in Windows 2003 and Vista.
Once you have the adapter ID for each members of your bridge, type the following command for each of your adapter:
netsh bridge set adapter 1 forcecompatmode=enable
You should come with the next window after typing in netsh bridge show adapter again.


Now you should have 2 different IP address for your guest and your host within the same network, you can ping from one to the other.
If your host is a Windows system, you need to disable Windows firewall first to allow your guest pinging your host.